
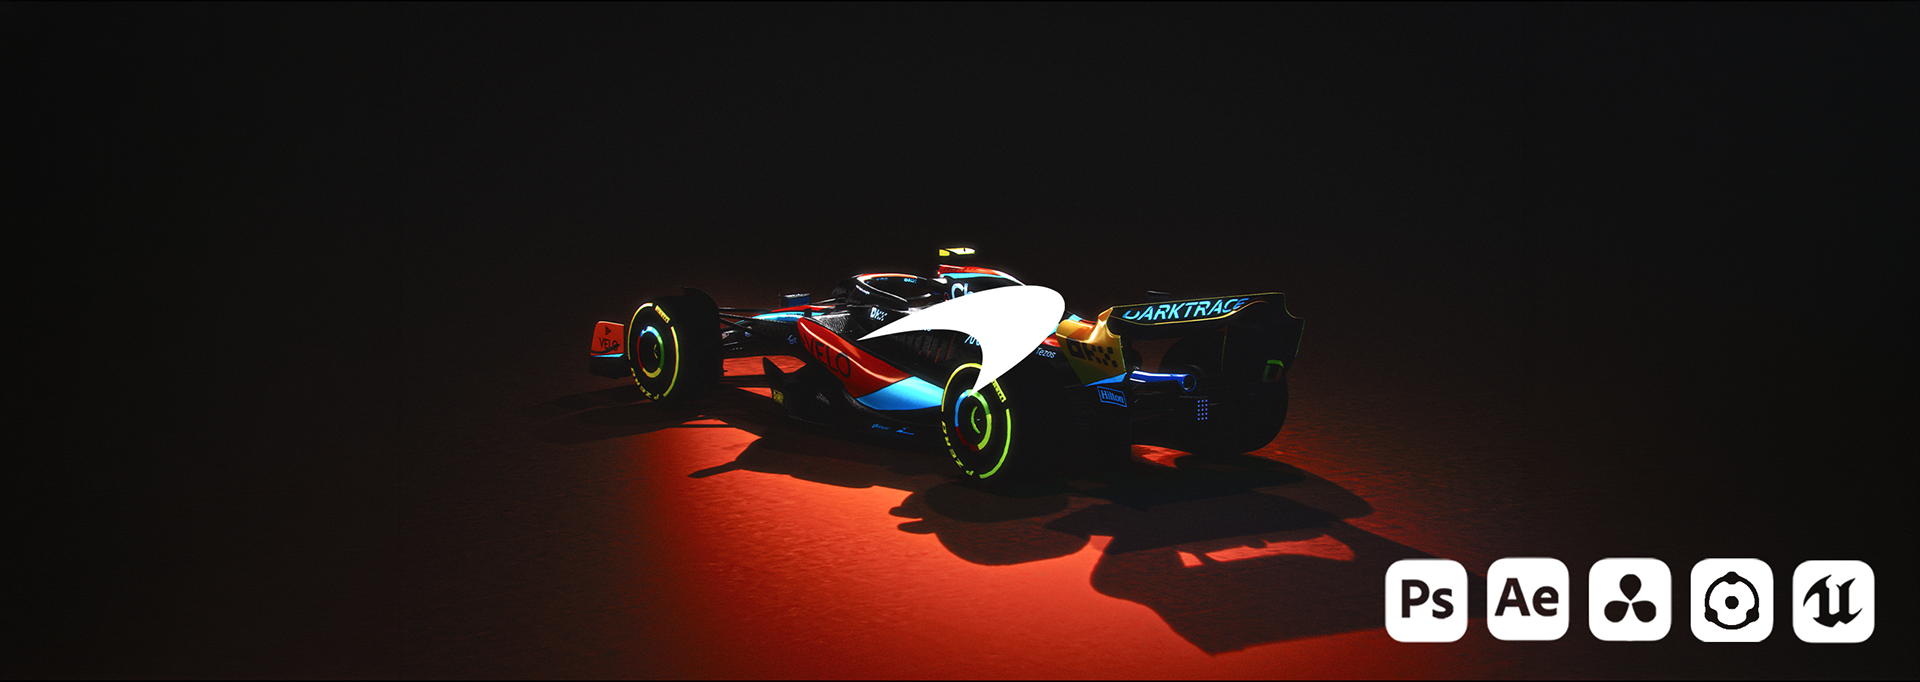
Project Overview
The McLaren MCL60 project was a fully CG automotive visualisation study developed in Unreal Engine 5, with the primary objective of exploring how a relatively low-detail, pre-existing vehicle asset could be transformed into a convincing cinematic image through material development, texture refinement, lighting, environment design, cinematography, composition, and post-production.
The base vehicle was sourced as a low-poly model from Sketchfab. Rather than replacing the asset with a higher-resolution model, the project was intentionally structured around the limitations of the existing geometry. The challenge was to determine how far the perceived quality of the asset could be pushed through surface treatment, controlled lighting, camera placement, environmental design, and image finishing.
The project therefore functioned as both an automotive visualisation exercise and a study in perceptual realism: the goal was not necessarily to increase polygon count, but to make the viewer perceive a technically limited model as a polished, premium automotive image.
Core Objective
The primary objective was to understand how cinematography and image construction can compensate for limitations in source geometry and texture resolution. The original model contained relatively simple geometry and required significant visual improvement before it could support a cinematic presentation. Instead of attempting to rebuild the complete vehicle, the workflow concentrated on identifying the surfaces that contributed most strongly to realism and improving those areas through texture manipulation, material response, lighting, and framing.
This involved modifying existing textures, developing selected custom materials, improving the visual separation between carbon fibre, painted bodywork, tyres, metallic components, and transparent surfaces, and then using controlled lighting setups to direct attention toward the most technically important areas of the car. The project was therefore less about asset creation from scratch and more about look development and presentation of an existing asset under production-style constraints.
Asset Preparation and Material Development
The initial vehicle asset was imported into Unreal Engine 5 and evaluated according to its existing geometry, UV layout, textures, and material assignments. Rather than treating the imported material setup as final, the surfaces were reorganized and visually refined to establish more convincing differentiation between material classes. Existing textures were modified where their resolution, contrast, color response, or surface information was insufficient for the intended presentation.
Selected materials were also developed further to improve the behaviour of the vehicle under cinematic lighting. Particular attention was given to the contrast between painted bodywork, exposed carbon fibre, tires, metallic mechanical components, glass, and livery graphics, since realistic material separation is one of the strongest contributors to perceived automotive quality. The process focused on making each surface respond appropriately to light rather than simply increasing texture detail. Roughness variation, highlight response, colour density, and reflective behaviour were therefore treated as important visual controls.
Working With a Low-Poly Source Asset
A major component of the project was intentionally retaining the original low-poly model rather than replacing it with a fully rebuilt asset. This introduced several visual limitations, including simplified surface transitions, reduced geometric detail, and less refined curvature in certain areas. Instead of allowing these limitations to become visually dominant, the project used camera selection, focal framing, controlled lighting, atmospheric depth, and selective shadowing to direct attention toward the strongest areas of the model.
Close-up compositions were therefore used selectively, while wider frames relied more heavily on silhouette, reflections, lighting contrast, and overall composition to establish the vehicle as a premium object. This approach demonstrated that perceived realism is not determined by geometry alone. When material response, lighting direction, composition, and image finishing are carefully controlled, even a technically modest asset can produce a visually convincing result.


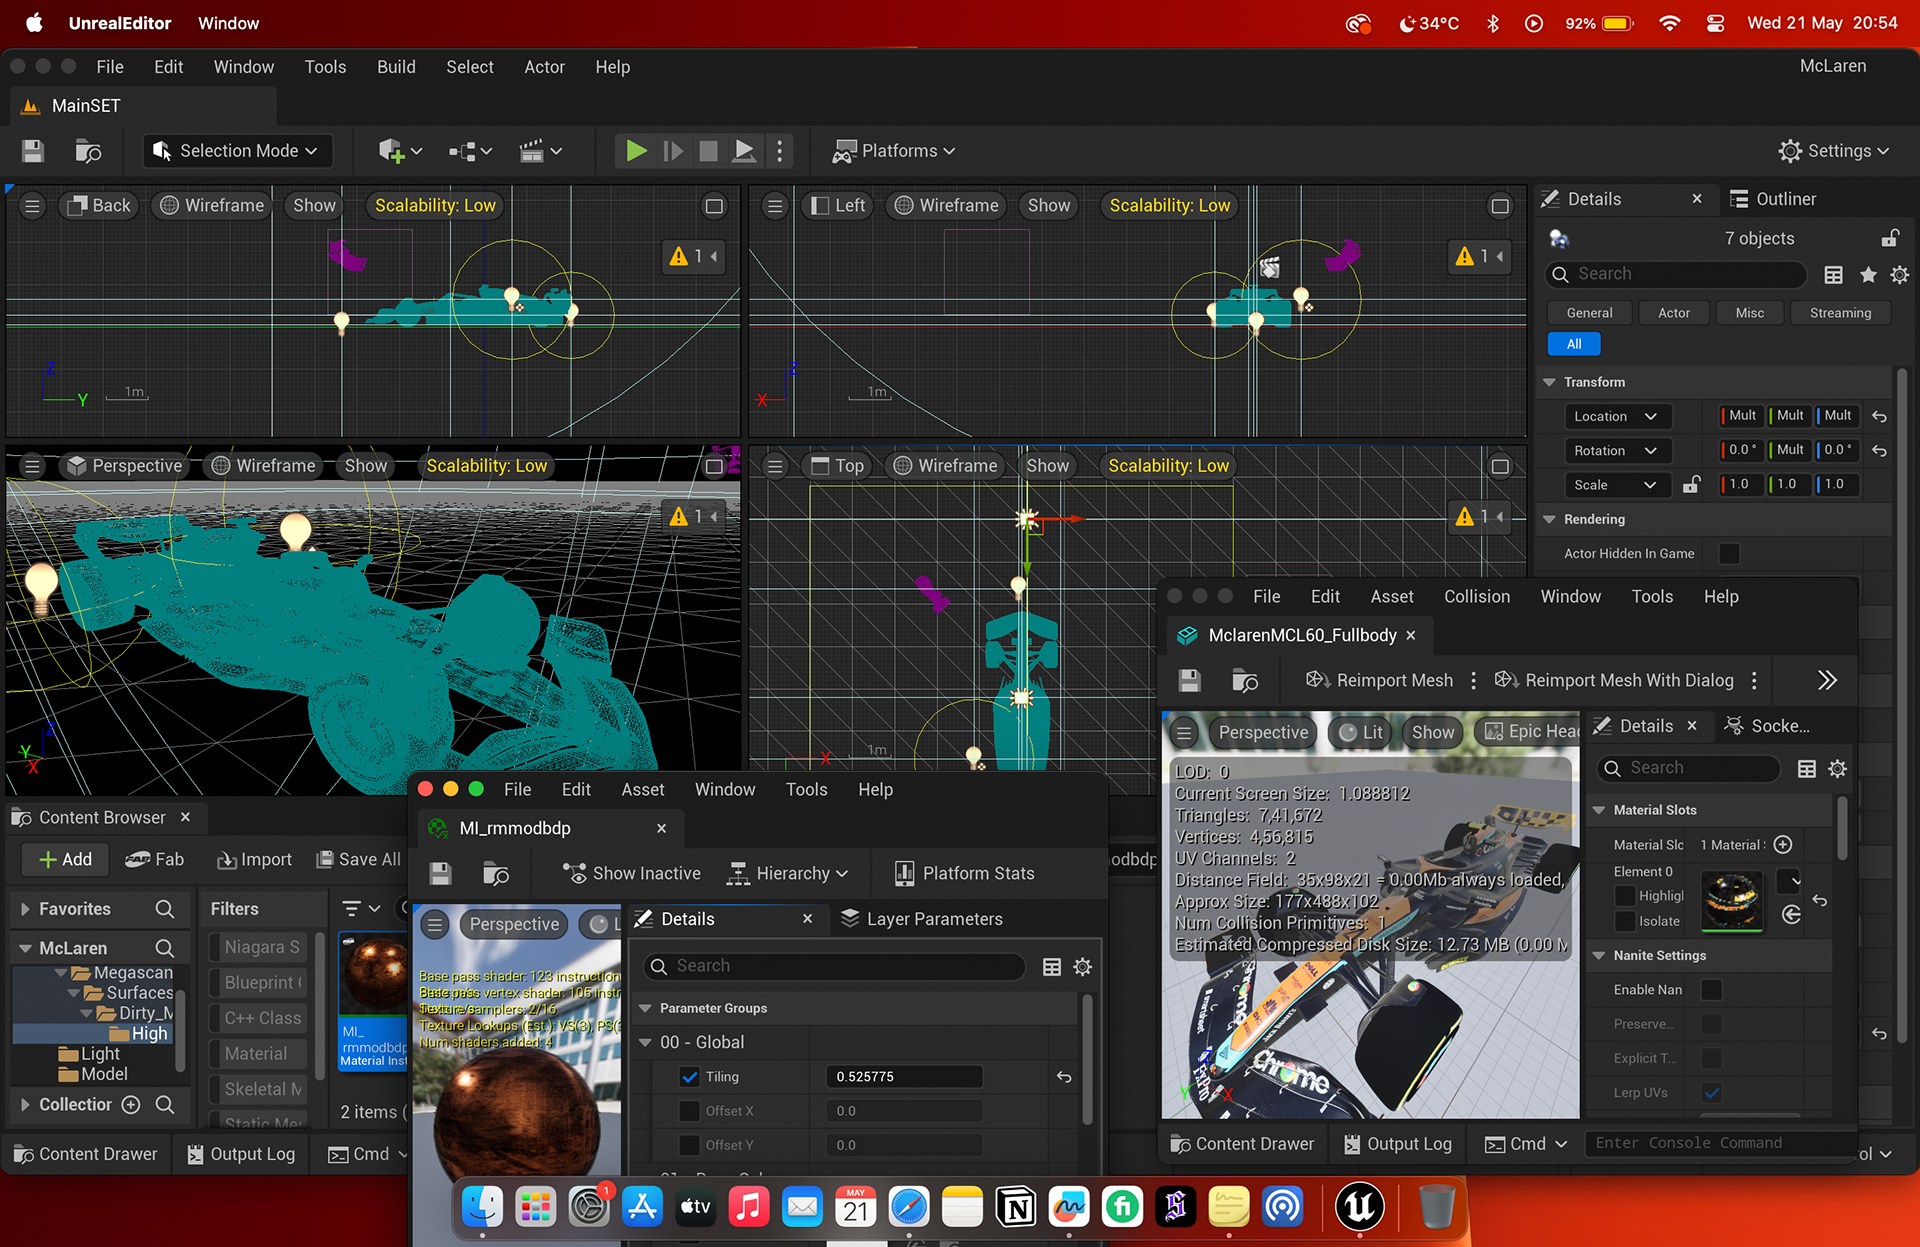
Unreal Engine 5 — (Cinematic Camera Layout & Viewport Rigs): Multi-view editor layout showing orthographic perspective bounds, scene lighting gizmos, and a live cinematic camera preview of the McLaren F1 car. / Static Mesh & LOD Configuration): Mesh editor window open over top-down wireframes, detailing triangle counts, distance field setup, and Level of Detail (LOD) reduction settings for the F1 bodywork. / (Lighting Pass & Material Node Graph): Viewport set to Detail Lighting mode with custom light actors casting volumetric illumination over the chassis, alongside an open material graph editor. / (Wireframe Viewports & Material Parameter Tuning): Quad-view wireframe orthographic projections paired with texture parameter controls for tire rubber and carbon fiber surface shaders.
Automotive Cinematography
The camera work was developed as an essential part of the visualisation rather than as a final presentation step. Multiple camera heights, focal perspectives, viewing angles, and framing strategies were explored to determine how the same vehicle could communicate different qualities. Low-angle cameras were used to exaggerate aerodynamic mass and ground clearance, while elevated views were used to expose the vehicle's upper surfaces, cockpit structure, bodywork transitions, and aerodynamic architecture.
Symmetrical frontal compositions were used when the objective was to emphasise engineering precision, while three-quarter and side-angle compositions were used to communicate motion, aggression, and overall vehicle proportion. The camera language was intentionally closer to automotive advertising and cinematic product cinematography than to a conventional technical asset turntable.
Minimalist Set Design
The environment was deliberately restrained so that the vehicle remained the dominant visual element. Rather than building a complex narrative environment, the project relied on minimalist studio-like spaces, controlled ground surfaces, atmospheric darkness, and selective lighting pools to create visual hierarchy. This allowed the lighting to perform most of the environmental work. Ground surfaces provided subtle reflections and colour interaction beneath the vehicle, while the surrounding darkness acted as negative space that separated the chassis and bodywork from the background. The minimal set design also reduced visual noise and made it possible to use stronger colour accents without competing with the McLaren livery and sponsor graphics.

High-Angle Cyan Studio Wash - Cool cyan lighting pass for neutral material evaluation. Exposes carbon fibre, panels, and cockpit detail without red influence.
Lighting Development
Multiple lighting configurations were developed to investigate how different illumination strategies affected the perceived quality of the vehicle. The dominant visual language was built around deep red and black environments, with red light used to generate reflections across the lower bodywork, ground plane, wheel areas, and selected aerodynamic surfaces. Several shots introduced a contrasting cool-blue or cyan component to create complementary colour separation. This was especially useful for defining the edges of darker carbon surfaces against an otherwise black environment. The lighting was therefore not designed simply to illuminate the complete car evenly. Instead, it was treated as a series of controlled zones intended to reveal specific surfaces while allowing other regions to fall into shadow.
Texture Refinement
Existing source textures were modified to better support the final presentation. The adjustments included improving colour consistency, increasing useful contrast within surface information, refining selected graphics, and adapting the supplied textures to the project's lighting conditions. Where the original texture information was insufficient, additional material treatment was created at the shader level rather than relying exclusively on texture resolution. This was particularly useful for surfaces such as carbon fibre and painted panels, where the final appearance depends heavily on roughness and reflection behaviour rather than purely on the base-colour texture.


Top-Down Orthographic Chassis Layout - High-angle orthographic view showing overall geometry and livery layout. Lighting isolates key elements like wings, halo, and sidepods. / Front Three-Quarter Dynamic Volumetric Lighting - Low three-quarter shot emphasising front aero and nose. Red backlight adds depth, with cool fill defining splitter and tyres. / Rear Three-Quarter Aerodynamic & Diffuser Focus - Low rear angle highlighting engine cover, rear wing, suspension, and diffuser. Red ground light enhances lower reflections. / Symmetrical Low-Angle Frontal Profile - Centered front view focusing on symmetry, nose, halo, and front wing. Edge lighting separates the car from the background.
EXR Rendering and Data Preservation
Final renders were produced as 16-bit EXR sequences to preserve image information for subsequent post-production. Rendering to EXR was particularly important for the project because the images were subjected to additional tonal, colour, and optical treatment after rendering. A high-bit-depth linear workflow provided greater flexibility for recovering highlight information, shaping contrast, adjusting colour relationships, and applying finishing effects without introducing unnecessary banding or compression artifacts. Still-image renders were processed in Adobe Photoshop, while animated material was retained as EXR image sequences for processing and grading in DaVinci Resolve.
Photoshop Post-Processing
Selected still frames were brought into Adobe Photoshop for additional image finishing. Camera Raw was used as part of the processing stage to refine exposure, contrast, colour temperature, micro-contrast, highlights, shadows, and overall tonal density. The post-processing was not intended to replace the Unreal Engine look-development stage. Instead, it functioned as a controlled finishing layer for refining the rendered image and pushing it toward a more polished automotive-advertising appearance. Particular care was taken to retain material separation after grading so that carbon fibre, body paint, glass, tyres, and metallic components continued to read as distinct physical surfaces.

Wide Side-Angle Chassis Elevation - Full side profile showing overall proportions. hot orange ground reflection enhances body contours and aero surfaces.
Lighting and Composition as Problem-Solving Tools
One of the key limitations of the source asset was its simplified geometry. Instead of attempting to solve every geometric deficiency, the project used lighting and composition to reduce the visual importance of those areas. Low-angle views were particularly effective at emphasizing the car's silhouette and aerodynamic mass. Dark backgrounds allowed the outer profile to be defined through rim lighting rather than visible geometry alone. Similarly, selective highlights were used to reveal curvature across the bodywork without requiring additional modelling detail. This created a stronger impression of surface continuity than the raw asset could provide. The resulting workflow was therefore based on visual prioritisation: technically important and visually convincing areas received stronger lighting and framing, while weaker areas were allowed to recede into controlled shadow.
DaVinci Resolve Finishing
Animated EXR sequences were brought into DaVinci Resolve for colour treatment and final image finishing. The grading process concentrated on contrast shaping, colour balance, highlight control, saturation management, and the relationship between the dominant red lighting and the darker environment. Resolve's available image-processing and finishing effects were also explored to introduce a more analogue and cinematic response. These treatments were applied selectively rather than uniformly, with the objective of reducing the overly perfect digital appearance that can sometimes result from a clean real-time render. The final image was therefore built through a combination of real-time rendering and post-render image treatment, allowing the Unreal output to retain its technical clarity while acquiring a more photographic visual response.


Elevated Rear Isometric View - High rear angle showing upper aero, DRS, engine cover, and rear structure. Overhead red light defines form and depth. / Clean Side Elevation Profile - Neutral side view for proportion and livery check. Even lighting keeps focus on overall shape. / Low-Slung Side Profile & Rim Light Setup - Low angle focused on wheels, brakes, and front wing. Rim lighting defines silhouette and tyre detail. / Aggressive Low-Angle Nosecone Detail - Close front view highlighting nose, suspension, and front wing. Red underlight reveals underside structure.
What This Project Demonstrated
The McLaren MCL60 project demonstrated that a successful automotive visualisation is not dependent exclusively on the polygon density or source quality of the model. The exercise was primarily about look development, controlled cinematography, material interpretation, lighting design, and image finishing. By modifying the supplied asset rather than rebuilding it, the project created a practical test of how much perceived quality could be generated through downstream visual decisions.
It also strengthened my understanding of Unreal Engine as more than a modelling or rendering environment. In this workflow, Unreal functioned as a complete virtual cinematography and look-development platform, where environment, lighting, camera, material response, atmosphere, and composition could be iterated together before the final image was transferred into a dedicated post-production pipeline.
Project Outcome
The final project transformed a relatively limited, pre-existing low-poly McLaren MCL60 asset into a series of cinematic automotive images through controlled material development, virtual cinematography, minimalist environment design, lighting, composition, EXR-based rendering, and post-production.
The primary success of the project was not the creation of a new vehicle asset, but demonstrating how effectively a technically constrained model could be repositioned through visual direction. The resulting images were designed to conceal the limitations of the source asset while presenting the car as a premium, controlled automotive subject. This project strengthened my workflow in Unreal Engine environment creation, automotive CGI, material and texture development, cinematic lighting, camera composition, and render-to-post colour finishing, while reinforcing the principle that realism is often achieved through the coordinated treatment of the entire image rather than through geometry alone.
